

A perfectly installed shower tray is the foundation of a beautiful and durable bathroom. But getting it wrong can lead to leaks, uneven finishes, or worse — costly repairs. This guide shows how careful planning and precision in construction make all the difference.
Why Shower Tray Design Matters
The shower tray is not just a base. It is the element that ensures correct water flow, hygiene, and long-term stability. When crafted with skill, it blends aesthetics with performance, giving peace of mind to architects, contractors, and homeowners alike.
- Supports effective drainage and avoids water pooling
- Prevents long-term moisture damage to subfloors
- Ensures tiles or surfaces sit evenly and cleanly
- Protects from costly reworks due to shifting or cracking
Step by Step: Building a Shower Tray with Precision
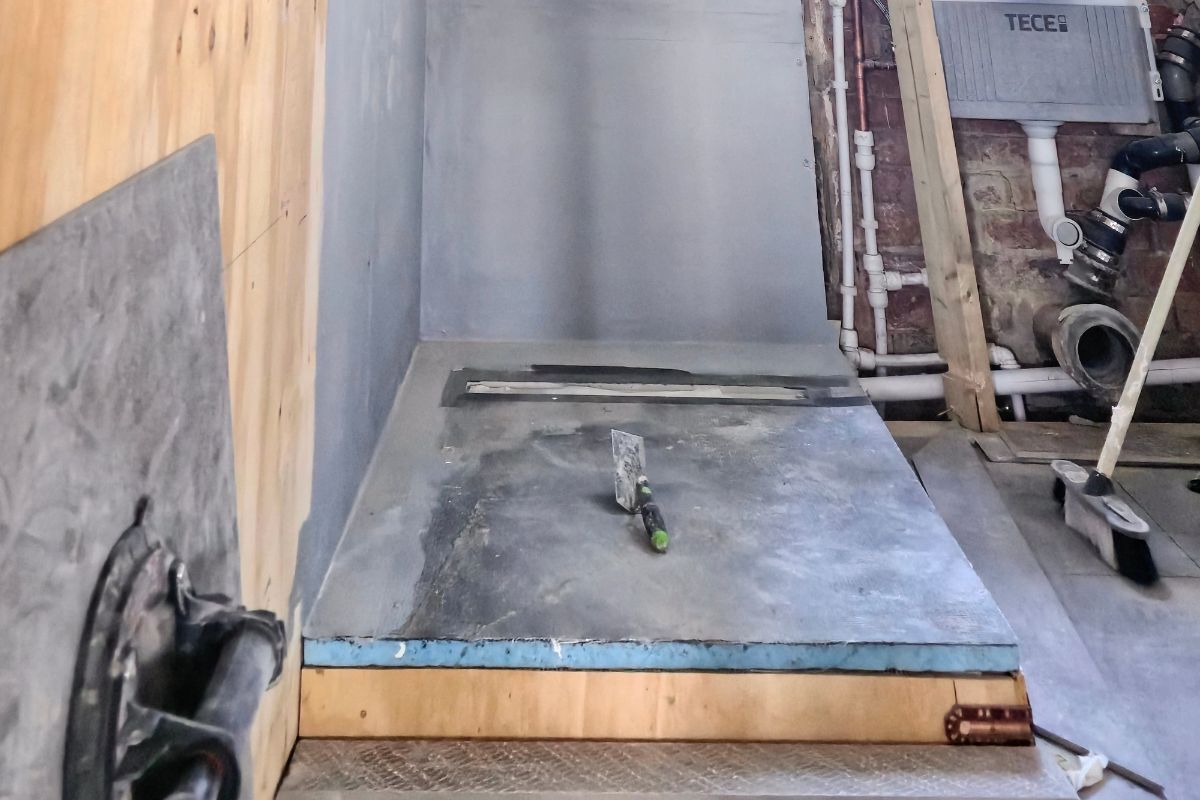
1. Preparing the Substrate
The process begins by checking the structural integrity of the bathroom floor. A clean, solid and level base ensures the tray will not shift or crack over time. Precision here prevents issues with slope and drainage.
2. Marking Out and Dry Fitting
All elements are measured and marked before anything is fixed. This includes outlet alignment, tray edges, and any platform building beneath. Dry-fitting helps identify mistakes before they become expensive.
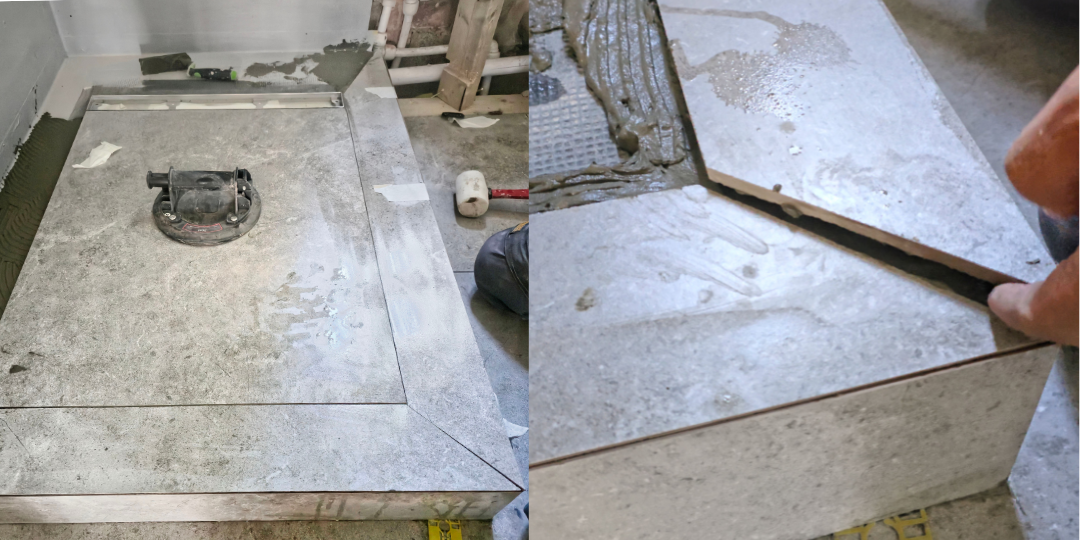
3. Constructing the Tray Platform
In this project, a custom platform is constructed to host the tray. Materials are precisely cut to match the shape, ensuring maximum stability. Each angle and cut is intentional, supporting long-term durability.
4. Levelling and Slope Management
One of the most critical phases. If the tray is not perfectly level or if the slope toward the waste is insufficient, water pooling and poor drainage will occur. This stage uses tools and visual confirmation for millimetre accuracy.
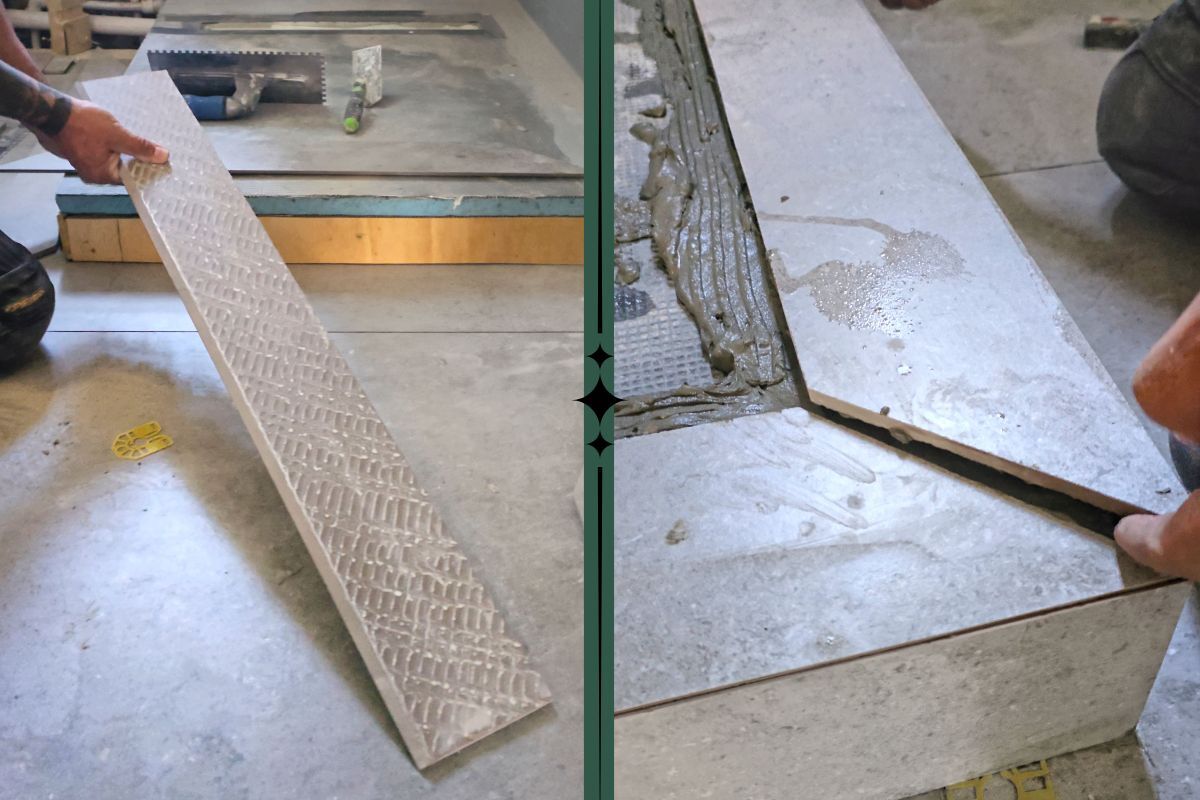
5. Securing with Waterproof Adhesives
Waterproof adhesives and appropriate fixings are applied to avoid future detachment. Only products rated for wet areas should be used. Poor sealing here will cause structural water damage and black mould over time.
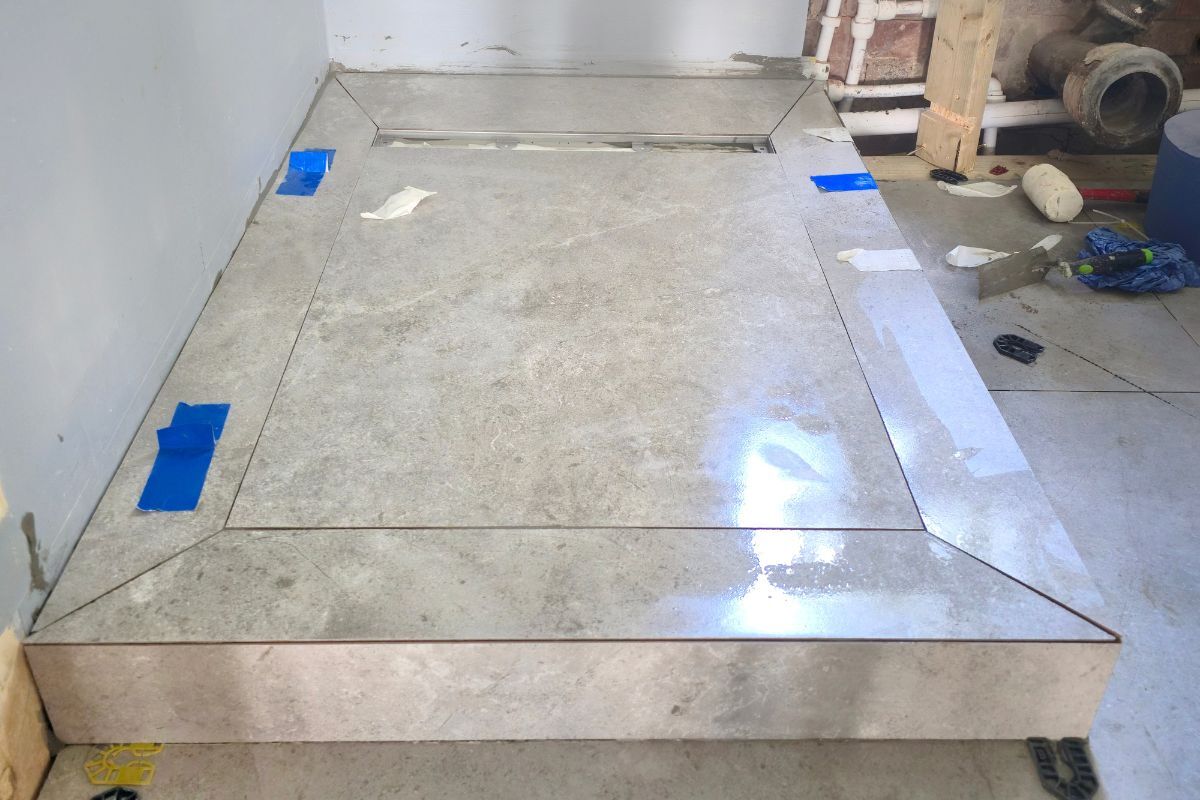
6. Checking the Flow and Finishing
Before final sealing or tiling, flow tests are done to verify correct drainage. No corners are cut. Every joint is checked, sealed, and cleaned. The shower tray is now ready to support luxury finishes with complete reliability.
Common Mistakes and Their Costs
Many issues in bathrooms come from poor shower tray installation. These errors can lead to hundreds or even thousands of pounds in future repair costs:
- Incorrect slope: Causes stagnant water, bad odours, and mildew
- Low-quality adhesives: Leads to tray movement and seal failure
- Poor platform planning: Creates instability under tiles
- No dry fit: Wastes expensive materials due to cutting errors
These issues may not show immediately, but once they do, entire sections of the bathroom may need redoing — often after tiling and fittings are already installed.
Why Precision is Everything
This project was a reminder that craftsmanship begins long before the surface is visible. Every unseen layer contributes to the integrity and beauty of the final result. That’s what professionals and architects appreciate — execution with intent.
From the substructure to the final grout line, we treat every phase as essential. Because the smallest detail can define the biggest difference in outcome.
FAQs
Can I install a shower tray directly on concrete?
Yes, but it must be clean, level, and sealed. A slight slope must still be ensured for proper drainage.
How long does it take to build a shower tray platform?
With proper tools and experience, it can take a few hours. However, the entire drying and testing process may extend over 1–2 days.
What is the best material for a shower platform?
Moisture-resistant boards, marine-grade plywood, and cement-based solutions are commonly used. Always pair them with proper waterproofing systems.
Is it worth building a custom tray?
For bespoke bathrooms or awkward layouts, custom trays give better results and avoid long-term issues compared to off-the-shelf options.
What happens if the tray is not level?
You risk poor drainage, water damage, and cracked tiles. Fixing these later involves removing floors and walls entirely.
Conclusion
Shower tray installation is one of those unseen crafts that define a successful bathroom. What appears to be a simple base holds the secret to waterproofing, durability, and elegance in your daily routine.
Precision takes time, but it saves money and frustration later. Whether you are an architect, a homeowner, or a builder — it pays to get this part right.
If you're planning your own project or want inspiration, follow us for more real build insights. We treat every corner of your project like the centrepiece it deserves.
.png?width=1080&height=540&name=How%20Much%20Does%20a%20House%20Extension%20Cost%20in%20London%20(2025%20Guide).png)